Mould—its very name might send a chill down your spine, especially if you’re a landlord or tenant. No one wants to discover it lurking within their walls. Mould isn’t just some minor inconvenience; it’s a serious health hazard. Exposure to mould can cause respiratory issues and allergic reactions and can even complicate existing health problems. Not to mention, mould can significantly devalue your property and create extensive damage if not handled promptly.
Why Is Mould Such a Big Deal?
Mould thrives in moist environments, feeding on building materials like wood, flooring, and drywall. The cycle of damage begins the moment you notice that musty smell or see those unsightly spots. Ignoring it doesn’t mean it will go away—it often means it’ll spread even further.
-
Health implications can range from sneezing and coughing to more severe respiratory problems.
-
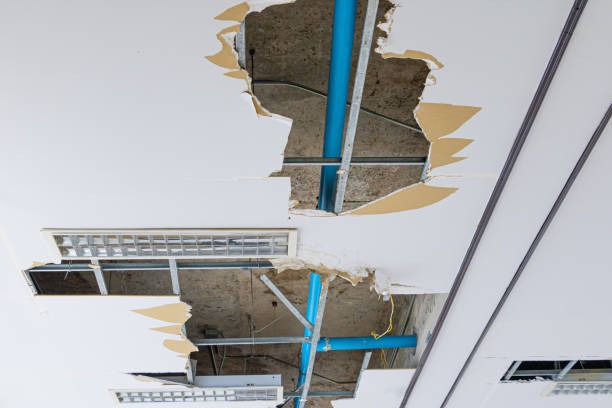
Mould can damage the structure of your home, weakening the walls and ceilings.
-
If left unchecked, mould can lower your property value by creating an environment that’s neither safe nor appealing to potential buyers or renters.
Identifying Common Types of Mould
Before exploring how to tackle mould issues, it’s important to identify what type of mould you’re dealing with. Here’s a quick overview:
1. Penicillium
This type often looks blue or green and can appear on materials damaged by water. It spreads easily around homes with water leaks.
2. Stachybotrys Chartarum
Also known as “black mould,” this type is notorious for its potential to cause serious health problems. It’s slimy and dark, often hidden behind walls or under floors.
3. Aspergillus
This mould species comes in many colors and can affect people with weakened immune systems. It’s commonly found in damp house areas like bathrooms and kitchens.
Beginning the Mould Removal Process
Are you ready to tackle that mould problem? The key is to approach this task methodically. Here’s your step-by-step guide:
Step 1: Assess the Damage
The first step is crucial—assessing the extent of the mould damage. You need to understand how widespread the problem is before you can effectively address it.
-
Identify areas with visible mould growth.
-
Note any musty odors that hint at the hidden mould.
-
Look for signs of water damage, like stains on ceilings or walls.
Step 2: Protect Yourself
Before heading into mould removal, prioritize personal safety. Make sure to wear:
-
Disposable gloves to prevent direct contact
-
Protective goggles to shield your eyes
-
A mask or respirator to avoid inhaling mould spores
Step 3: Contain the Area
You don’t want those pesky spores spreading to other parts of the property. Seal off the affected area using plastic sheeting and duct tape. Remember to close vents and doors to prevent mould from spreading further.
Tackling Mould Removal Techniques
Once you’re all geared up, it’s time to dive into the actual removal process. This can include several techniques, so let’s break them down:
Step 4: Cleaning Hard Surfaces
For mould on non-porous surfaces, a simple cleaning solution might do the trick. Use detergent, vinegar, or a specialized mould cleaner:
-
Mix your cleaning solution according to the product instructions.
-
Apply the solution to the mouldy surface.
-
Scrub with a brush until the mould is removed.
Step 5: Removing Mould from Porous Materials
Materials like carpets, drywall, and upholstery absorb mould spores, making cleaning slightly trickier. If they’re extensively affected, the best course of action is often to remove and replace these materials entirely.
When to Call in the Professionals
It’s important to know your limits. mould removal is no small task, and sometimes professional intervention is necessary. Consider seeking professional help if:
-
The mould covers a large area (larger than 10 square feet).
-
You suspect black mould is present.
-
There have been recurrent mould issues even after previous clean-ups.
In areas like Lambton County, professionals offer full mould removal in Sarnia, ON, which ensures thorough and safe remediation, protecting your health and property.
Mould Prevention Tips for Your Home
Once you’ve successfully removed the mould, the last thing you want is a return visit. Preventing mould is an ongoing effort. Here are some tips:
1. Keep a Dry Environment
-
Use dehumidifiers to maintain low humidity levels.
-
Ensure proper ventilation in moisture-prone areas like bathrooms and kitchens.
2. Fix Leaks Promptly
-
Don’t ignore minor leaks; they can quickly turn into major problems.
-
Regularly check your roof, pipes, and walls for potential leaks.
3. Regular Home Inspections
-
Regularly check areas susceptible to moisture and mould.
-
Opt for annual inspections to catch early signs of mould growth.
Legal Considerations for Landlords and Tenants
Mould in rental properties is not just a health issue; it’s a legal one too. Both landlords and tenants have responsibilities that should be clearly understood.
1. Responsibilities of Landlords
Landlords need to ensure a safe and habitable environment:
-
Address water leaks and structural damage promptly.
-
Provide a plan for mould remediation if mould is found.
-
Conduct repairs and updates that minimize mould risks, like installing efficient ventilation systems.
2. Responsibilities of Tenants
Tenants play a role in maintaining the property’s condition:
-
Report any mould growth or water damage to the landlord as soon as it’s noticed.
-
Maintain reasonably dry and ventilated conditions within the unit.
-
Cooperate with landlords during the mould removal process.
As daunting as mould may seem, tackling it head-on with a clear, methodical approach makes a world of difference. Whether you’re a landlord aiming to restore your property from damage or a tenant wanting a safe living space, taking the right steps ensures a healthy environment and peace of mind.
Final Thoughts
Remember, when in doubt, calling in professionals to handle the situation can save time and energy and keep everyone safe. Mould removal doesn’t have to be scary; with our guide, you’ve got this!